CREATE A TRAVEL BLOG ON YOUR OWN

Blogging is one of my passions. Since my early professional years, I’ve worked on developing websites on WordPress (I was working on Visual Composer at that time – a drag-and-drop website builder). I was Marketing Manager for a Marketing Agency and we were developing websites for customers, including the optimization for the search engines like Google, the SEO. In 2009, for Christmas, I received as a lifetime present a domain with my name. I was only posting about my ongoing projects, not wanting to make a fuss about it. In 2014, when I moved to Paris and started working in Luxury Fashion, I turned my blog into a Fashion Blog. I named it at that time, Fashionista in Paris. The first few years in Paris have been hard for me, working and studying for my MBA in Luxury Marketing. I did not have time to have a LIFE back then. After finishing my MBA, I got a new job as a Luxury Store Manager and started to travel to relax and skip the busy life in Paris.
Every month I took 4 days in a row and just went on a city break in a European city. Because it was mostly a last-minute booking, I did not always have friends available to travel with me. So I started going alone and soon discovered how amazing traveling Solo can be. It was not a thing back then to travel Solo and people were in shock the first time when they heard me traveling alone. But Solo Travel gained in popularity in the past years.
In 2020, when covid-19 was registered for the first time in Venice, I was on a city break in Valencia, Spain, to try to fight a burn-out I was having for several months. The first isolation made me cancel my trip to Singapore, Bali, and Phuket. But, it was the best thing that ever happened to me as it made me realize I can no longer continue like this. As soon as European travel resumed in June 2020 I went on a 3 months vacation in Italy, Greece, Germany, and Croatia. I realized then that this is what I want to do next. I did not dare to start immediately my travel blog, though. It took me two years of fully traveling just for my well-being before launching myself seriously in this project.
I knew I wanted to Explore the World, but also to Educate and Empower other people to Solo Travel. It was only after I read the statistics about the Solo Travel niche that I decided this is what I wanted to do. Because, according to new research from MMGY from 2022, one in four travelers plans to travel solo in the next six months with Gen-Z and Millennials leading the way. Further on, the Solo segment is anticipated to dominate the global leisure travel market due to various factors such as social media influence, different preferences, interests, and psychographic traits.
As my motto is to Explore, Empower and Educate Solo Travelers, I thought it would be useful to educate other people that want to embark on this journey and create their travel blogs.
So that being said, here’s my ultimate guide to starting a successful travel blog!

Establish Your Audience
Don’t just create another travel blog. Establish a niche and create the profile of your PERSONA (the person who will read your Blog). This will determine how you will shape your content for your audience.
My Blog is about Educating and Empowering Solo Travelers all over the world to take the step and travel Solo. My PERSONA is 30-40 something independent men and women with a passion for travel, in search of solo experiences around the world.
With these two simple steps, I keep my target audience in mind at all times so that I create content they will love.

Set Up Your Domain and Hosting
Once you’ve found your domain, it’s time for you to claim your website. For that, you’ll need to pay an annual fee to insure that the URL is yours. If you do not pay it before the expiration date, your audience will see a message on the first page that this domain has not been extended. I suggest avoiding that.
An URL needs web hosting, meaning renting space on a server. I suggest having a dedicated server, only for your domain, not sharing it with other domains.
Read more: Hosting your Blog on a Server!

FIND THE PERFECT DOMAIN NAME
The domain of your Blog is like your name. Once you bought it, you stick with it for life. There is no going back.
Think about names that are relevant and memorable for your audience. Have at least one keyword relevant to your blog. Having a long name that you constantly have to spell out will do you no good. Avoid confusing words and punctuation! Keep it simple and ask for feedback.
I did not have much choice, as I’ve received my domain with my name as a Christmas present back in 2009. This allowed me to change the content of my blog when I felt it is no longer useful to me. So using your name can be a good thing.

Set Up Your Blog on WordPress
I’ve used WordPress since 2009 and I would not recommend another platform. It so happens to be the most popular blogging platform and excellent for beginners. It comes with tons of plugins and designs and is FREE!
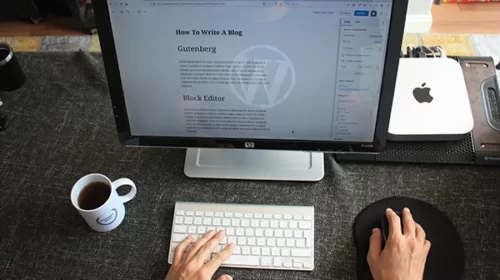
To log into your Blog type https://yourdomainname.com/wp-admin into your browser. Type in your username and password, so you can log into your WordPress dashboard. To get familiar with WordPress, I recommend you watch the tutorials on WordPress for Beginners. They are quite helpful if you just start blogging.
Choose a WordPress Theme
Picking your website theme is even harder than your domain! Trust me. A WordPress theme includes page layouts, colors, formatting, and even fonts. Like your domain name, you have it for the long run. Switching to another theme may need a developer to adjust the code, so better choose wisely.
Back in 2009, I’ve chosen a paid theme from Envato (formerly known as ThemeForest). Little did I know that these themes come with a breach of Security and I had my Blog hacked in 2016 and full of viruses. I had to take the entire team down and recreate my Blog from the scratch. It was a Fashion Blog, named Fashionista in Paris at that time. Because I was also working in Luxury fashion I was no longer motivated to write about this stuff. I felt that my job never ends.
I now use Themify and Elementor to customize my pages as I see fit. They are more stable and more secure in terms of Firewalls.

Essential Plugins for Travel Blogs
First rule: Too many plugins will kill the Performance of your Blog. So stick to the essential plugins only. And the golden rule to the first rule is to always keep them up to date. ALWAYS!
Here are the most useful plugins for WordPress when you first start your Travel Blog:
Akismet Anti Spam: Akismet is a useful plugin that catches and automatically deletes comments that are SPAM. And you get a lot of them, so you better automize this part.
Yoast SEO: Yoast SEO is the best plugin that will optimize your Blog for Search Engines. I’ve had quite a few in the past years, so trust me this is the most complete and FREE plugin. Make sure you install this from the moment you create your Blog. It will instantly create the sitemap that you can, later on, add to Google Search Console for indexation. With Yoast SEO you can set up the Meta Title and Meta Description for each post (the title and short text you see on Google results when you search for something).
Yoast Duplicate Post: My favorite one as it allows you to duplicate the design of a page entirely and just change the text and photos afterward. It’s a time saver.
Site Kit by Google: A one-stop solution to use everything Google has to offer from analytics to site performance.
BackWPup: It is very important to back up your site and save it on the cloud. In case it gets hacked or viruses, you will have to take out the entire theme and upload a clean backup version. So do it at least twice a month. Delete the backups from the plugin afterward.
Grammarly: If your Blog is in English then you need this Google Extension to save you from a lot of embarrassing typos.
Wordfence Security: A very useful Anti-virus, Firewall, and Malware Scan plugin to protect your blog from hackers. Been there done that! You don’t want this to happen to you.

Connect Your Blog to Google Analytics
This is the first thing you want to do after installing your theme. Registering your Blog to Google Analytics. Why? Because you will have insights from the first day you put your Blog up and running. Having a complete vision of how your Blog started growing and when is very important, trust me.
Now, what this Google Analytics is? It is a support feature from Google that gives you a 360 degrees vision of your traffic and very useful information about your reader’s behavior. Thanks to Google Analytics you will have data about your traffic, the number of visitors, how much time they spend on your site, from which channel they’ve arrived on your Blog, and from which page they leave your Blog.
This is the most complete and useful analysis that you’ll find regarding the visitors and impressions on your Blog.

Learn the Basics of SEO
SEO stands for Search Engine Optimization, meaning how likely your blog is to be found in the first page results on Google. This is the goal of every blogger. SEO not only means the keywords you are using, but also the title and the short description of your page or blog. Yoast SEO offers you the possibility to write the Meta Title, Meta Description (even the excerpt of a post) and tells you the length preferred by Google. SEO stands also for Readability and how you organize your text inside a post.
We cannot talk about SEO without talking about the performance of your blog. This is the most important thing you should take into consideration from your first page. PageSpeed Insights from Google should become your best friend. It analyses the note Google is giving you when crawling your website and showing you on the search results page. it shows you the note for the mobile version as well as for the desktop version. You need a note above 85 to be on Google’s grace. Google doesn’t know you yet, so you need to prove to it that your blog is trustworthy to appear on the first results. Let’s see how you can do that very easily:
The headings are so important. For a good note on readability, make sure you use consecutive headings. You start with Heading 1 on top of your post and then continue with Heading 2, 3, and so on. Also, the DOM, the length of a section is very important for Google nowadays, so make sure you cut your section in headings or use the See More button.
PageSpeed Insights will also teach you the importance of using one Font on your entire website. Your Blog will not load until all the fonts are loaded. You need to capture the attention of a new visitor in 2, 3 seconds top. If your blog takes more than 3 seconds to load only the fonts, you lost that visitor forever and your Bounce Rate will go over the clouds.
Make sure you upload .webp format for ALL your photos and that your theme has the Lazy Load option active. And try as much as possible to use the exact dimensions for each photo, depending on where you will use it.

USE Stock Images for a more professional design
A good design has to be accompanied by good-quality photos. If your photo is pixeled it will not do you any good. Always think that some people might have a 4K screen when reading your blog. Your blog needs to have enough quality to display high-resolution photos for a 4K desktop.
The best way to make sure you check this part is to use high-quality images and graphics on your blog. If you have a good mobile phone that will give you high-quality pictures go for it, but if not, make sure you use them only on your social media platforms and for your blog stick to stock photos. You can find some FREE options online.
Unsplash: For beautiful, high-resolution, royalty-free images, you can use this stock image website that proposes tons of free photos that you can choose from.
Freepik: For beautiful free vector pictures.
Adobe Photoshop and Lightroom Classic to edit your photos, lens correction, and upright transformation, but also to save them in .webp format.
Canva Pro: Free design website to create custom graphics for your blog and your social platforms.

Optimize your blog for desktop and mobile AT the same time
DID YOU LIKE MY TUTORIAL ON HOW TO CREATE YOUR OWN TRAVEL BLOG?
Tell me in the comments section if you found these steps useful and what step-backs did you encounter on your blogging adventure.
Will be more than happy to help.


